Get Started Using LightShape

Before starting from scratch, take a look at the included “ExampleSimple” or “ExampleCompare” scenes.
Assets/LightShape/Example/ExampleScenes
Note: I strongly advise taking a look at the Editor & Inspector Reference by clicking here.
Note: See bottom of page for Tutorials & Information
If you already own LightShape, be sure to register by sending an email to cscherubini@gmail.com to receive update information.
Note: This tutorial is not using either of the Example Scenes.
Description:
LightShape is a tool for Rendering Cubemaps and Assigning them to Objects with Reflective Materials.
The basic setup to render a Cubemap is two GameObjects. An LSManager and an LSProbe.
The LSMaganer is where the LSProbes are organized and some Global Settings are used.
The LSProbe is where the Rendering actually Happens. This is the Point Of View at witch the Cubemap is generated from. The LSProbe is also where some additional features reside.
For a full Description of all options in both the LSManager and the LSProbe, as well as the LightShape Window, please see the Editor & Inspector Reference Page.
In the next steps I am assuming that you have a Scene of Your Own with Objects that have Cubemap Shaders on them.
If you prefer watching instead of reading, you can watch this slightly more comprehensive Video.
Step 1: Go to Window/LightShape
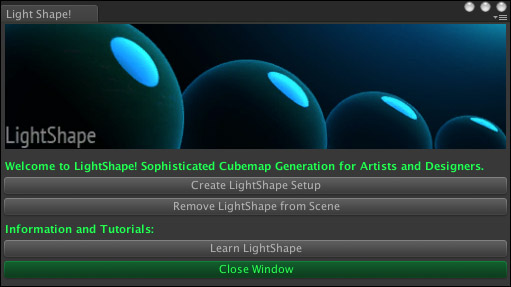
Step 2: Click the Create LightShape Setup Button
There should now be two objects. An LSManager and an LSProbe as its child.
This first LSProbe is automatically Gathered into the Probe List of the LSManager.
Note: Probes can be parented to any object or to none if you like. Just remember to Gather All Probes on the LSManager each time you create a new LSProbe.
Note: Create new LSProbes by duplicating them with “Ctrl d” on Windows or “Command d” on Mac.
You can now close the window or Click the Remove LightShape from Scene button. That will remove any LightShape related Objects from your scene permanently.
Note: The Remove LightShape from Scene button will ONLY remove LightShape objects from the Currently Open Scene Hierarchy.
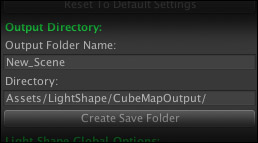
Step 3: The very next thing you should do is create an Output Directory so that Lightshape knows where to save your beautiful Cubemaps.
At the top of the LSManager Inspector, you will find variables for an Output Folder Name and a Directory.
Attention Free License Users! You MUST Set your Game View Resolution Dropdown to Standalone(your resolution).If you don’t, the Cubemaps will look wrong.
Also make sure that Use ReadPixels? (Works With Free License) is check to ON. If you Don’t, you will get an error. This is because the other way uses Render Texture which is not included with the Free License of Unity.
Step 4: Now that you have an Output Directory defined, you can just render out a Cubemap if you like. But it wont get assigned to any Objects.
Step 5: In the LSProbe Inspector, (child of the manager) near the bottom, in the Object Management: section, you will find options for gathering objects that you want effected by the selected LSProbe. You can adjust the Gather Radius: and move the LSProbe or move the object so that it is within the LSProbe’s Radius Sphere.
Note: If the object is not assigned, you probably need to give it a Shader that uses Cubemaps. Gathering only gathers Objects with Cubemaps.
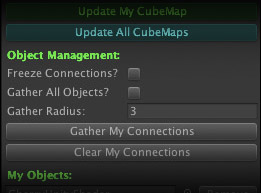
Step 6: You can now hit Gather My Connections to Gather the objects into the probe’s objects list. If the LSProbe is selected, you will now see your object or objects in the LSProbe Inspector object list as well as a line going from the probe to the object in the scene view.
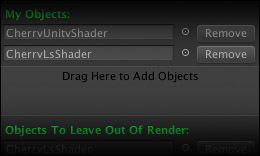
As an alternative to Auto Gathering, you can just drag the object into the My Objects field to manually assign them to the Probe.
Step 7: Now that your object / objects are assigned, click Update My CubeMap. The Cubemap is generated and auto assigned! (provided it has a shader that uses Cubemaps)

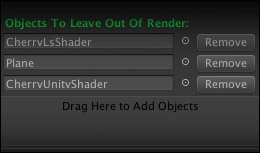
Step 8: (Optional) If there are objects that you dont want rendered into the Cubemap image, drag them to the Objects to leave Out Of Render section.
Why would you want to leave an object out? An example might be that you have an object but you want the image taken from inside it. Go ahead try it without excluding it, you’ll see what I mean. (Unless it is a Reeeaaally Simple Object)
So, that was the section to get you started. It basically renders a standard cubemap with nothing special.
In the next section I will explain a bit about the true power of LightShape … Light Shapes!
Other Info: